Wednesday 2 December 2009

Holidays

Hello Everyone !
I hope you all enjoy your holidays ! I probably won't be around much as I have my little grandson (Dawson) coming over to visit for Christmas this year. I am so excited I won't even be able to think straight. I hope to come back next year full of great new recipes to try after things have calmed down from the holidays.

I also want to say thank you to those who follow my little blog. It is one of my little hobbies I enjoy.

I wish you all a very Merry Christmas and a special New Year !
Much love,
Sherrie ♥

Thursday 12 November 2009

Maple Drizzled Apple Muffins


Click on image for larger view
I thought these turned out so nice I would scrap the page. So we'll see how this comes out when I post it.
These muffins are very nice. The only thing I would do different the next time I make them is I would grate my apple so it distributes more evenly. And I would probably cut the apple amount down to 1 cup as they were very moist. But the taste is out of this world.

Thursday 15 October 2009

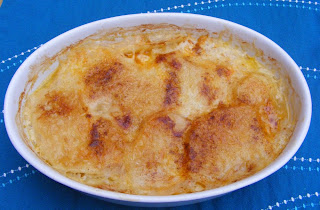
Potato Savoyarde


click on image to see larger size
I tried making this recipe and it's really nice. It's a variation of the Dauphinoise Potato. The main difference is the Dauphinoise potato is made with cream and garlic. This one is made with broth and cheese on top. It turned out wonderfully and I will definitely be making these again (can you say Christmas dinner) They are very easy to make. This picture doesn't do these mouth watering potatoes justice but since I made it I thought I'd post it anyway.

Preheat oven to 200 deg C/ 375F
Serves 2 generously and let's face it if we're not being generous why bother :o)

2 large potatoes, peeled and thinly sliced
1 can consomme or 1 1/2 c chicken broth
1 egg, beaten
150 grams Gruyers cheese, grated
butter optional
salt and pepper and nutmeg

I coated my baking dish with spray olive oil. Mix all the ingredients above together except the cheese. Transfer to the baking dish, sprinkle over the cheese and dot with butter if desired. Bake 45 minutes or until brown and crispy on top.

NOTE: For additional color sprinkle smoked paprika over the cheese before you bake it. I didn't do it this time but I think even a little liquid smoke would be nice in these.

Sunday 11 October 2009

Raspberry and white chocolate chunk cookies


Heat the oven to 180/c/I made these cookies and they turned out really nice. I didn't add the raspberries as I am not a big fan, but I did add in macadamia nuts instead. This recipe was taken from the Nov 2009 issue of Olive Magazine it is also listed on the Carnation website.


8 ozs/225g unsalted butter

8 oz/225g golden caster sugar

6 ozs/ 170g Carnation Condensed Milk

150g/5 oz white chocolate chopped

175g raspberries


  • Heat the oven to 180C/350F

  • In a large bowl, cream the butter and sugar until pale and then stir in the condensed milk. Sift in the flour and then work into a soft dough with your hands. Mix in the chocolate

  • Take a small ball of dough and flatte nwith your fingers. Place 2-3 raspberries into the center of the cookie and fold-up the sides of the dough to encase the raspberries. Repeat with remaining dough.

  • Line baking tray with parchment paper or spray with cooking oil. Space them well apart and bake for 15 - 18 mins or until golden brown at the edges.

  • Leave to cool slightly before transferring to a cooling rack.

  • NOTE: The dough without raspberries will keep in the fridge fof 2-3 days or 1 month in the freezer. Freeze in small slightly flattened chunks and bake as required.

Saturday 26 September 2009

Cream of Coconut Cake


I found this recipe on the internet and I don't remember where I got it from so if it's yours please let me know and I will definitely give credit. However, I followed the recipe and it was wayyyyy too sweet for me. The icing that is not the cake. The cake is delicious ! And yes it's made starting with a box cake mix. ;o) And if you are in UK I don't know where to get a plain old white cake mix at. I had one I brought over from home so if you do please let me know. This cake has such a nice flavor you could eat it without any frosting but . . .it sure is nice with it.


1 18.25 ounce package white cake mix
3 large eggs
1/4 c vegetable oil
1 8 oz can cream of coconut (I used 1 can coconut milk)
1 cup sour cream


Preheat oven to 350F (175C). Grease and flour one 9x13x2 inch pan. Combine in large mixing bowl, cake mix, eggs, vegetable oil, cream of coconut and sour cream; beat with electric mixer for 4 minutes. Pour batter into prepared pan.


Bake for 35 - 40 mins, or until wooden pick inserted in center comes out clean. Cool cake completely before frosting. Serves 12


Cream Cheese Frosting


1 8 oz package cream cheese, softened
1 tsp vanilla extract
2 tbsp milk
4 cups powdered sugar ( I recommend 1/2 to 1 cup)
Coconut for garnish frozen or fresh is okay


Combine cream cheese, vanilla, milk and powdered sugar and beat with electric mixer until smooth. If a thinner consistency is desired, add more milk, a teaspoon at a time.

Frost cake and garnish with coconut.


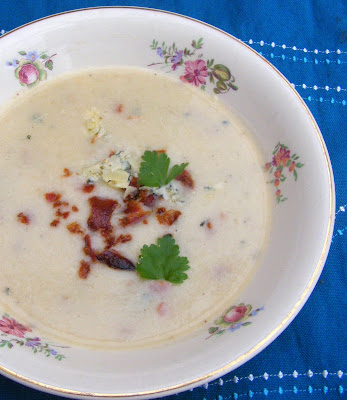
Bacon & Baked Potato with Blue Cheese Soup


I made this soup and there were no leftovers. I think that says it all. The creamy mild blue cheese is optional. I served it with a crusty baguette. It was delicious. I found this recipe at http://www.kraftfoods.com/ and adjusted it to suit our tastes.


1 tbsp butter/margarine

1/4 c chopped onion or shallot

1/4 c chopped celery

2 c. chicken broth (can use low fat/ low sodium)

1 1/4 c milk (I used 2%)

2 baking potatoes, baked and cubed (1/2 inch)

salt and pepper

8 slices oscar mayer bacon, cooked crispy and crumbled

3/4 c cheddar or creamy blue cheese optional

1 tbsp green onion slices,

1/4 c sour cream


Melt butter in saucepan and add onions and celery and cook and stir 5 mins. or until crisp tender. Add in broth, milk. potatoes and cheese. Stir to mix and then crush potatoes with back of spoon. Reduce heat and simmer 5 minutes.


When ready to serve stir in cheese and stir until melted through.


Serve with green onions, some reserved bacon and sour cream if desired.


Notes: I used blue cheese and shallots instead of cheddar and onion. I also left off the celery as I didn't have any. I also whizzed my potatoes instead of crushing them with a spoon. I wanted a smoother soup. As for the bacon you might as well go ahead and cook the whole pack because when you smell it you're gonna want to sample it to make sure it's "soup quality" bacon...lol


Let me know if you like it. This can easily be doubled. The potatoes can be baked days in advance and kept in the refrigerator until ready to use. Just take them out and let them come up to room temperature before using. This is a perfect autumn warmer me up soup.


Wednesday 23 September 2009

Take 5 Ingredients - Tomato baked eggs

This also appeals to me and is one for my vegetarian friends. It's one of those quick prep and throw it in the oven kinda meals and forget about it until it's done. Another one of the Take 5 Ingredients Recipes for you.


Serves 4, Prep 10 mins, Cook 50 mins


900g/2lb ripe vine tomatoes

3 garlic cloves

4 large free-range eggs

2 tbsp chopped parsley and/or chives


1. Heat oven to 200C/400F. Cut the tomatoes into quarters or thick wedges, depending on their size, then spread them over a fairly shallow 1.5 litre ovenproof dish. Note: The recipe didn't call for greasing the pan but if I make it I will spray it with the cooking spray first.

Peel the garlic , slice thinly and sprinkle over the tomatoes. Drizzle with 3 tbsp olive oil, season well and stir everything eogether until the tomatoes are glistening.


2. Slide the dish into the oven and bake for 40 mins until the tomatoes have softened and are tinged brown.


3. Make 4 gaps among the tomatoes and break an egg into each and cover the dish with foil. Return to the oven for 5-10 mins until the eggs are set to your liking. Scatter over the herbs and serve piping hot with thick slices of toast or warm ciabatta bread with a green salad on the side.


204 cal per serving

Take 5 Ingredients - Smoked Salmon & Pea Frittata

Hello Everyone !

The other day, along with a BBC magazine I got, came a little booklet entitled Take 5 Ingredients. I really like quite a few of the recipes so thought I'd share a few of them here over the next few days for us all to try. So, let me know if you try one and what you think. I don't know about you but I can always use a recipe that only uses 5 ingredients.

Serves 4, Prep 20 mins, Cook 30 mins.

500g/1 lb 2 oz cooked new potatoes (peeled)
200g pack smoked salmon
8 large eggs
2 tbsp chopped dill
100g/4oz frozen petit pois (garden peas)

1. Thickly slice the potatoes. Cut the salmon into wide strips. Crack the eggs into a bowl, beat with a fork until lightly foamy, then stir in the smoked salmon, dill, peas, and season. Finally, stir in the potatoes.

2. Heat 3 tbsp olive oil in large non-stick frying pan, carefully pour in the egg mixture and cook over a fairly low heat for 10-15 mins until the egg is starting to set just under the surface.

3. Put a plate that is slightly larger than the top of the pan on top and invert the frittata onto it. Slide it back into the pan and cook for a further 5 mins to brown the underside. Slide onto a plate and leave to cool for 5 mins before cutting into wedges.

Tuesday 22 September 2009

Jessie's Dessert

Hi Friends
I have been such a bad blogger this month and I apologize for that but, since I can, I am going to blame part of it on my friend who came to visit. We had such a good time and I didn't do a lot of cooking new things so, no new blogs. However, upon her return home she told me about a new dessert she tried that her daughter-in-law Jessie made which was really wonderful. I haven't tried it yet but I fully intend to so, I don't have any pictures. If you do try it how about letting me know what you think. And I want to say I had the privilege of meeting Jessie in Feb of this year and she is just as sweet as can be and thank you for letting me share this one here. Jessie you can correct me if I am wrong on this I tried to write it down quickly. And a quick thanks to Nancy for telling me about it. It makes my mouth water just thinking about it. It sounds like a quick and easy dessert to make.

Ingredients:
8 ozs cream cheese
1 can pie filling
1 refrigerator pie crust

Beat your cream cheese until smooth and fluffy, add in your pie filling. Take and cut however many rounds you can get from a refrigerator pie crust. You will need 2 for each little dessert. Add the filling to one round, then top with the other round. Using a fork, crimp around the edges to seal. Deep fry until golden brown, remove and dust with sugar.

Note: As far as I know, I haven't seen any refrigerator pie crusts here in UK but of course I could be wrong. I plan on using puff pastry for mine and I am sure they will come out just as nice. Thanks again Jessie !!!

Tuesday 1 September 2009

Lunch - The Alford Arms (again)


As some of you know I have a friend visiting with me for two weeks. Her name is Nancy and she is a dear friend and we are so happy to have her with us. We went out for lunch at one of our favorite places yesterday. The Alford Arms is one of our favorite places to go. The food was delicious as it usually is and we even split a dessert which was out of this world. My friend and I had Parma ham and fontina fre range chicken supreme on boulangere potatoes with broad bean pistou.

Boulangere potatoes are potatoes sliced very thinly with onions sliced the same way, then you just layer them up in a greased dish. Pour over hot stock and bake for 1 hour in a hot oven. The are really good. We were not disappointed. My husband had Smoked haddock on wilted spinach with sarratt watercress hollandaise. It was equally wonderful as I had a little "sample" just to make sure.

Nancy and I then split a dessert of rich chocolate and walnut tart with malted milk ice cream. At the time I wished we had gotten two it was that good.

This place never, ever disappoints. We go here for all special occasions. They don't advertise as they don't have to their food speaks for itself. The staff are very friendly and helpful. If you want to find the Alford Arms a google search will do it. They have multiple locations.

Broccoli & Stilton Creamy Soup

I made this when a friend was visiting and served it with some nice crusty bread. It was a big hit. This soup is so quick and easy to make and it will feed the masses. It can easily be doubled for a larger family.

Serves 3

1 med head broccoli chopped up
3 tbsp shallots chopped fine
2 tbsp oil
1 large potato, chopped
2 cups chicken stock
1/4 c crumbled Stilton (blue cheese)
a dollop of cream, optional
salt and pepper to taste

Stir fry shallots in oil until just beginning to brown and smell oh so nice. Add chicken stock and stir, bring to the simmer. Cook broccoli and potato however you want to do it. I did mine in a ziploc bag in the microwave made for microwave cooking. You can do it either in water in the microwave or boil until done.

Drain vegetables and then add to chicken stock. I used an immersion blender and blended until smooth. (You can also remove from heat, cool and blend with hand mixer or blender.) Stir in your Stilton (blue cheese) until melted. At this point season according to your taste. I didn't add any salt as I felt my chicken stock along with the blue cheese was salty enough.

I then poured into bowls to serve and added a dollop of cream.

NOTE: If you want a thicker soup add more potato.

Friday 7 August 2009

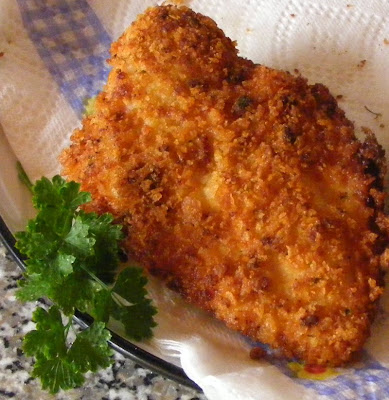
Southern Fried Chicken with a surprise


Okay I am from the South in the good old USA and we like to think our fried chicken doesn't get any better. BUT, I came across this suggestion and it is worth considering. It's not completely as good as KFC but it is close . . . .It just needs that "something" else. I am going to try adding Thyme and see if that does it. So let me know if you try something and get that "special taste we all know and love".
Cover your ears "Colonel".

Serves 4

Ingredients
4 boneless, skinless chicken breasts
1/4 cup all purpose flour
2 eggs, beaten
1 c bread crumbs
1 tsp smoked paprika
3 tbsp Ranch dressing powdered mix
oil to fry
salt and pepper to taste

First, thing pre-heat your frying pan with oil, not on high but just below it. And make sure you have enough room in your pan so they're not too crowded. I probably had a good inch or inch and a half of oil in my pan and added more as needed. I want it to "fry" not pan seared or anything like that. And no lid on the pan either we don't want it to steam and go soggy. We're looking for crispy chicken here.

Take your flour, eggs and bread crumbs and put each into a separate bowl. Add the paprika and powdered Ranch dressing mix to your bread crumb bowl and mix around.

Then dip your chicken into the flour and coat good, then over in to the egg and coat good, then lastly into your bread crumbs and coat as good as you can. Place in frying pan, add salt and pepper and fry each side until golden brown. Then turn down the heat to finish off the chicken.

Those bread crumbs just add a little bit more crunch to the chicken and make it look so much more evenly browned. Just remember it's easy to burn the crumbs.

Let me know how you get along with this. It is worth the effort. We ate it for two days and enjoyed it each time.

Wednesday 5 August 2009

Cauliflower and Cheese Bake

Cauliflower and Cheese Bake

This delicious, cheesy casserole is a great way to enjoy cauliflower, and it makes a wonderful addition to the dinner table. I don’t know about you but I am always looking for something else to add as a side. And this looks like a good one.

Ingredients:
• 1 large head of cauliflower, about 1 1/2 to 2 pounds, cut into flowerets
• ***Sauce***
• 4 tablespoons (2 ounces) butter
• 1/4 cup all-purpose flour
• 1/2 teaspoon salt
• 1/8 teaspoon ground black pepper
• 2 cups milk
• 1 tablespoon Dijon mustard
• 1 1/2 cups (6 ounces) Cheddar cheese, mild or sharp
• ***Topping***
• 1 cup soft fresh bread crumbs
• 1 tablespoon fresh chopped parsley, optional
• 1/2 teaspoon ground paprika
• 1 to 2 tablespoons melted butter
Preparation:
Boil or steam cauliflower in water until just tender, about 6 to 8 minutes. Drain and set aside.
Grease a 2-quart baking dish. Heat oven to 350°.
In a medium saucepan, heat butter over medium heat. Add flour and stir until smooth and just bubbly. Add salt, pepper, and milk. Cook the sauce, stirring, until thickened and bubbly. Add the mustard and cheese and continue cooking, stirring, until cheese is melted.
Combine the cauliflower with sauce and spoon into the prepared baking dish.
Combine topping ingredients and sprinkle over the cauliflower mixture. Bake for 15 to 20 minutes, until the casserole is bubbly and topping is browned.
Serves 6.
Original recipe from : http://southernfood.about.com/od/cauliflower/r/r81030e.htm?nl=1

Monday 27 July 2009

Teriyaki Salmon Wraps with Roasted Red Pepper

A few months ago we had family over and I made my Salmon Teriyaki and the recipe if you are interested is already on this blog. We had one salmon fillet left over. So this morning for our "brunch" at work we're having Teriyaki Salmon Wraps with Roasted Red Pepper. This made enough to serve 2 generously. Let's face it we might as well be generous. I cooked 6 fillets and it fed 4 people already so here are 2 more meals. This is delicious and refreshing and I will definitely make it again.

Ingredients:
2 Flour tortillas
1 leftover teriyaki salmon fillet (see recipe on this blog)
1 1/2 tsp lemon pepper
3 tbsp cream cheese (I used Philadelphia, any brand will do)
2 whole roasted red peppers from a jar
2 large romaine lettuce leaves

Note: This needed something to lift it a little but, I didn't want to use lemon juice as it would also thin it too much. The lemon pepper worked perfectly and didn't compromise the consistency.

Take your salmon fillet and flake it in to a bowl. Add the sour cream and mix. Stir in lemon pepper and mix really well. It will seem thick but that is okay.
Spoon onto flour tortilla and spread out evenly with a knife.

Take roasted red peppers, drain, open up and remove seeds and dry really good with a paper towel on both sides. I cut mine into three pieces and laid it vertically on top of the cream cheese mixture. Making sure to stay just a little away from the edges on the sides.

I then tore my lettuce up into pieces and place it all over that randomly.

Roll up taco style and enjoy ! This is delicious.
Serves 2

Sunday 19 July 2009

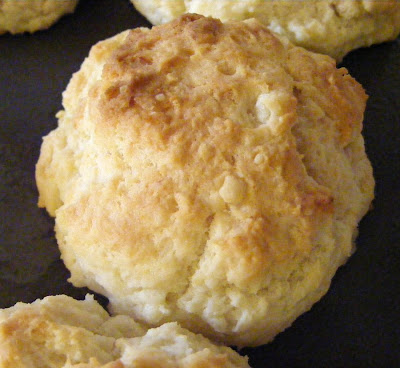
French Onion Biscuits


A friend of mine over at http://jbsvegetarianrecipes.blogspot.com/
posted this recipe and it is the best thing I have had in a long, long time. There is just the hint of onion that somehow just makes these taste so good. I will definitely make these over and over again. My sad wrinkly looking biscuit doesn't do this recipe the justice it deserves. You will have to take my word for it this one is worth a try. Go ahead try it and let me know how you like it.

2 cups Bisquick
1/4 c milk
1 container French onion dip (8 oz)

Preheat oven to 450 degrees F.
Mix all the ingredients together in a bowl, drop by spoonfuls onto a greased baking sheet. Cook for 12 - 14 minutes or until lightly browned.
Inhale you have my permission because, you know you will !!
Note: My container wasn't exactly 8 ozs so I topped mine up with sour cream and they were wonderful.

Pan Fried Chicken with French Style Sauce


Pan Fried chicken with French Sauce
Your choice of boneless white or dark meat chicken, thicker pieces pounded to about 1/2 inch thick. ( I used three chicken breasts and did not pound them)
Salt and pepper, to taste
1-2 tablespoons of olive oil, or a mixture of oil and softened butter.
Procedure
Heat a sauté pan over medium high heat until hot, about 3-5 minutes, depending on your stove.
Lightly salt and pepper the chicken pieces on both sides.
Add the oil, and then the butter, if using. Heat until the oil shimmers.
Place the chicken pieces in the pan, “prettiest” side down, leaving at least ½ inch between pieces. Let cook, adjusting the heat to achieve a fairly robust sizzle, for about 3-4 minute. Resist the temptation to poke at or move the chicken. Just let it cook.
Watch the meat as it cooks, and you will be able to see a ring of white travel up from the edges of the chicken as it sautés. Once the ring of cooked chicken appears to have cooked about half-way, turn the chicken with tongs. If it is “stuck,” don’t force it. The meat will release naturally once it has browned.
Wait another 30 seconds or so and try again. Make sure to keep adjusting the heat. You don’t want a lot of popping, just a robust sizzle and hiss.

Remove from heat and keep warm.

Sauce:
1 tbsp Oil
1/2 c thinly sliced mushrooms (I used canned)
2 tsp minced shallot
1 tbsp Dijon mustard (I used whole grain)
1/2 c chicken stock
1/2 c dry white wine
salt and pepper, to taste (I left this out)
1 tbsp tarragon, thyme or marjoram
small pat of butter

Over medium-high heat, in the pan you used to cook the chicken, add the oil and saute the mushrooms until they give up their liquid and then it evaporates. Add the shallot and saute until they begin to caramelize and then add the mustard and stir.

Pour in the stock and wine, stirring and scraping the bottom of the pan. Reduce (simmer) liquid by about half.

Taste and add salt/pepper if necessary. Remove from the heat and whisk in the herbs and butter.

Adapted from a recipe by reluctant gourmet @
http://www.reluctantgourmet.com/
He has some great advice, tips and recipes, check his website out you will be glad you did.

Wednesday 8 July 2009

Tomato, cheese and chorizo tart


click on image for larger view, this is Option 2 with the tarragon and grated fennel. It just melts in your mouth !

This was my first attempt at making a tart with puff pastry and I can tell you I am hooked on this stuff. I can't wait to experiment some more with it and try some sweet things also. I am not much of a sweet eater I prefer savoury. But if you want to try an easy one this is for you. I made two variety's with this one and much preferred the one with the shredded fennel and addition of tarragon. It just gave it another layer of flavor.

Tomato, cheese and chorizo tart

½ - ¾ cup grated gruyere cheese
Tomato slices
Chorizo sausage
2 squares puff pastry
Salt and pepper
1 tbsp olive oil

Option 2 – All the above plus:
1 tbsp tarragon, optional
1 fennel bulb, grated

Note: On one of the tarts I added the tarragon and fennel just as an experiment. I can tell you now that it was absolutely wonderful ! I will definitely do that again.

Preheat oven to 190 degrees celcius. Take your puff pastry and spread it out on a non-stick pan or one with grease proof paper on it. Take a small knife and make a cut (being careful not to cut all the way through) about an inch in from the outside. This will leave the middle part to hold our good stuff and the outer one inch will “puff up” to hold the good stuff in. To help ensure our middle part doesn’t rise prick with the tines of a fork on the middle bit.

Next, take your chorizo sausage and slice into thin rounds. Pan fry them until they are about ¾ of the way cooked being careful not to overcook them or they will go hard. I would say no more than a minute or two depending on how thick you left them. Set aside to cool. Note: Next time I will just buy the already sliced chorizo sausage.

Add gruyere cheese to puff pastry (only in the middle bit) making sure to evenly spread it around. Then top that with tomato slices and chorizo sausages alternating until it’s all covered. Season with salt and pepper to taste. Add tarragon if you like. Brush with olive oil.

Bake 15 – 20 minutes until pastry is puffed and golden brown.
Serves 2-3

Sunday 5 July 2009

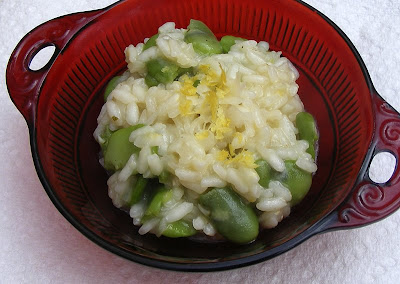
Broad bean, pecorino & lemon risotto


click on picture for larger image

I made this and we really liked the fresh taste that the hint of lemon gave this risotto, it just lifted it up. The broad beans are delicious. The broad bean has to be shelled twice but, well worth the effort. I had never made anything using broad beans before. It's a refreshing, clean tasting little bean and it works perfectly with grains. It's also a great source of protein. I have included the history and a little nutritional information because I thought it was so interesting.

A little history on the broad bean before the recipe.

The broad bean or as many know it as the faba bean has a whole host of names the fava bean, horse bean, field bean, tick bean and Windsor bean. Before the discovery of the Americas it was also the only bean known of in the old world.

Although no near ancestor has been found in the wild, remains of the broad or faba bean have been found in Neolithic sites in Israel dating back to 6800-6500 BC. It took another 3000 years to find its way north to the Mediterranean and central Europe but it remained a valuable source of protein throughout the old world until the introduction of the phaselolus bean from across the Atlantic. They were eaten by the Greeks, Egyptians, Chinese, in Northern India and in Roman times the gladiators were fed a staple diet of beans and barley to prepare them for battle.


It is popular myth that the ancient Greek mathematician Pythagoras died being pursued into a bean field. He felt unable to trample on any of the beans believing that the souls of man transformed into beans after death

Here is the broad bean after I shelled it the first time.

click on picture for larger image

The nutritional bit:
For centuries broad beans were a valuable source of protein when meat was scarce. They are high in protein (about 25% when dried) but lack some amino-acids so should be combined with a grain such as wheat, barley or rice. This is done quite naturally which is why popular dishes such as beans on toast and dhal and rice contain both a bean and a grain.

Broad beans also contain copper, niacin, folate and vitamin C. There is of course more of these nutrients, especially vitamin C, in fresh beans than dried.

It is a surprising fact that the enzyme for digesting the broad-bean is lacking in some 100 million people world-wide. This condition is known as favism is a form of haemolytic anaemia and effects mainly people of Mediterranean and Middle-Eastern descent. To confuse the Pythagoras link even further it is thought that the triangle loving ancient Greek also suffered from the condition. Rest assured, we ate this wonderful little bean with no problems.

Here it is in the pod see how each bean is attached with it's own little holder.
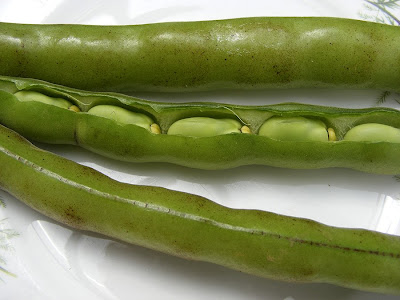
click on picture for larger image

Now on to the recipe !

Ingredients
1 lemon, zested
50g pecorino, grated (I used parmesan)
300g arborio rice
2 large knobs butter (knob = 1 tbsp)
1 glass white wine
200g cooked and double podded broad beans (see note)
1 Litre (2 cups) vegetable or chicken stock
fresh, cube or concentrate is fine
4 shallots, finely chopped
1 garlic clove, crushed

Directions:
1. Cook the shallots and garlic gently in a large knob of butter until soft. Add the rice and stir until all the grains are shiny. Turn up the heat and then add the wine and bubble until absorbed.
2. Add the stock bit by bit until the rice is tender but, still has a little bite. Stir in the broad beand with the remaining butter, most of the lemon zest and half the cheese. Serve topped with the rest of the pecorino and zest.

NOTE: To double pod the broad beans, first shell the beans as usual. Then take those "beans" and boil for about 3 minutes, you will notice they turn a very light mint greenish white color. Then take them off, rinse with very cold water and let them cool enough to "peel" the outer, leather like shell off again. Inside you will find the beautiful dark lime green broad bean.

Recipe adapted from www.bbcgoodfood.com

Friday 3 July 2009

Chicken Kebabs


We cooked out on the grill most of the weekend last weekend as it was just way to hot to heat up the oven inside. Until this heat leaves it's either cooking outside on the BBQ grill or inside in the crock pot/slow cooker. I made these kebabs and they turned out so good I thought I'd share what I did. They are sooooo easy to make. I also took our Pok Choy and threaded it on a skewer and it was nice too. Very simple and easy that's my kinda cooking !

2 boneless, skinless chicken breasts, cut into small chunks
1/2 red bell pepper cut into pieces
1/2 green bell pepper cut into pieces
1 large potato, not peeled cut into slices
2 tsp turkish seasoning
Oil to coat
Skewers

I took my potato slices and put them on a paper plate and microwaved them for a couple of minutes just to let them get started cooking. Just watch them depending on how thick you cut them. You dont want them cooked to mush just the beginnings of being cooked so they are still firm enough to thread on the skewers. Take your chicken and peppers and potato and coat lightly with oil. I used sunflower oil you can use whatever kind you prefer. I then added all these into a ziploc bag and added the turkish seasoning. Zip it up and mix it around from the outside until all things are coated. You can use any seasoning you like. Cajun, Turkish, Lemon Pepper, oil and lemon zests, anything, the possibilities are endless. Let it marinate as long as you can up to a couple of hours in the refrigerator. Alternate the peppers, potatoes and chicken on the skewers and cook over the grill until done(or in the oven). It all depends on the temperature of your grill as to how long just watch them.


For the Pok Choy I just washed it, then lightly coated it with sunflower oil , sprinkled some salt on it and skewered it. It was really nice done that way.
Note: If you are using wooden skewers be sure to soak them in water first so they don't catch fire.

Saturday 27 June 2009

Southwestern Chicken and Rice Casserole

I made this last week and thought it was definitely worth sharing the recipe. It was simple and easy and turned out delicious ! It can be assembled right before you bake it, or you can build it ahead of time, cover the casserole dish, pop it in the refrigerator and have it ready to go into the oven to bake for dinner.

SOUTHWESTERN CHICKEN AND RICE CASSEROLE
(Source: EMC newsletter)

Ingredients:
1 (10.75 oz.) can cream of chicken soup (you can Campbell's Healthy Request Cream of Chicken Soup)
1 c. water
1 c. thick and chunky salsa
3/4 c. uncooked long grain white rice
1/2 tsp. onion powder (I left this out)
1 c. frozen whole kernel corn, thawed (I used 1 (11 oz.) can Mexicorn, drained)
1 (15 oz.) can black beans, drained and rinsed (my addition)
4 skinless, boneless chicken breast halves
1/2 c. shredded Mexican cheese blend (I used cheddar cheese)


Spray a 12x8 inch shallow baking dish with nonstick cooking spray. Drain the black beans and mix with the corn. Add to the baking dish. Next, add the chicken breasts on top of that.(these can be whole or cut into strips, I will do strips the next time) Then stir soup, water, salsa, rice, onion powder together and pour on top of chicken breasts.

Cover and bake @ 375 degrees for 45-60 minutes or until chicken and rice are done. Sprinkle with cheese (I returned the dish to the oven for about 5 minutes to let the cheese melt).

Serves 4.

Monday 22 June 2009

Vacherin Fribourgeois


My husband and I are cheese lovers. So, over the weekend we tried a new cheese. Well, not a "new" cheese but, new to us. It's called Vacherin Fribourgeois. It's a Swiss mountain cheese made in the canton of Valais using milk from local village dairies. It says it's made using traditional mountain methods and the origin of the cheese dates back to 1448. It's made from unpasturized cows milk.


It's a semi-soft cheese with a nutty, creamy taste. There is a hint of strength at the end for lack of a better way to describe it. It's addictive. You take a piece and a cracker and you think okay that's enough for me. Then the next thing you know you're cutting off another piece. It's that kinda cheese. The kind you just want to keep on eating. So if you see it give it a try. It definitely gets a thumbs up from us.

Sunday 14 June 2009

Pasta Salad with Fennel


Ingredients:
2 cups dried farfalle pasta,(bowtie) cook according to directions and drain
1 red bell pepper chopped
1 medium carrot, peeled and grated
½ cup fennel, grated
2 ribs celery, peeled and chopped
½ cup garden peas, (I used frozen)
5 tbsp mayonnaise
1 tbsp rice vinegar or red wine vinegar
Salt and pepper to taste
Fennel fronds to decorate

Mix all ingredients together and refrigerate. It’s actually better the next day. The fennel just gives it a subtle sweetness. You can add any amount of vegetables you want depending on how many you need to feed OR you can half this recipe (which is what I should have done). Other things that would be good are canned or frozen corn, onions, boiled eggs, broccoli florets.

Note: I don’t know if everyone knows this or not but if you don’t like the “stringy bits” from the celery, peel it with your potato peeler and it will remove those easily. Also before I grated my fennel I cut off the end piece and removed the outer few “leaves” for lack of knowing what else to call them. They are usually tough.

Special Note: Thanks to hubby for getting the pictures for me. I couldn’t do this without all your help!

Saturday 13 June 2009

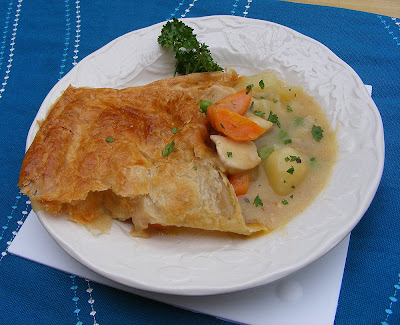
Chicken Pie with Herbs


This was the first chicken pie I had ever tried and I had never really used puff pastry before. I am sold on that stuff. It turned out good and we enjoyed it.
Ingredients:
1 1/2 cups diced potatoes
1 cup diced carrots
1/2 tsp salt
1 tablespoon olive oil
1 1/2 cups boneless chicken breast halves, cubed
1 cup diced celery
1 cup chopped onion
1 teaspoon Cajun seasoning
3 tablespoons butter
1/2 cup all-purpose flour
2 cups chicken broth
1 tablespoon snipped chives, plus more for topping (I left this out)
2 tablespoons chopped fresh parsley
1/2 teaspoon dried leaf marjoram or thyme (I used thyme)
1/2 - 1 cup frozen peas, thawed, I used fresh
salt and pepper to taste
1 sheet puff pastry or refrigerated pie crust or 1 recipe homemade pie crust
1 egg whisked with 1 tbsp water

Preparation:
Preheat oven to 350 F
Grease a shallow 2 1/2 to 3 quart baking dish. (I used the spray sunflower oil)

Put potatoes and carrots in a med saucepan, cover with water and add 1/2 tsp of salt. Cover the pan and bring to a boil over medium heat, reduce to low and cook for 8 to 10 minutes or just until tender. Drain and set aside.

In a saute pan or skillet, heat olive oil over medium heat. Saute chicken with celery, onion and cajun seasoning, stirring, until chicken is cooked through. Transfer to a bowl and set aside.

In the same saute pan or skillet, melt butter over medium-low heat. Add flour and cook, stirring, until well blended and bubbly, about 2 minutes. Stir in chicken broth and continue cooking, stirring, until it begins to thicken. Add the potatoes, carrots and chicken mixture, along with chives, parsley, marjoram and peas. Stir gently to blend. Taste and add salt and pepper as needed.

Roll out pastry to fit your baking dish. Spoon chicken and vegetables into the prepared dish and fit the pastry over the filling. Brush gently with the egg mixture and cut several 1-2 inch slits over the top to let steam escape. Snip more chives over the top of the crust.

Bake for 25 - 30 minutes, or until golden brown and filling is bubbly.
Serves 6
Adapted from a recipe at About dot com/Southern Food
Notes: I halved this recipe and it did just fine for us.

Tomberries . . . a tasty, tiny tomato


I was at the grocery store yesterday to pick up some charcoal and there they were. The teeniest, tiniest little tomatoes I have ever seen. I just had to come back and show them to you. They are called Tomberries and they are just adorable. They compare in size to a gooseberry. The ones I got came from Holland. And they taste good and look very attractive in a salad. I had to make a picture of one beside a regular beefsteak tomato just for comparison. Can't you just see these on a veggie tray they would look wonderful. We've been eating them like candy around here. The container is half empty already. Give them a try you will love these little beauties.

Wednesday 10 June 2009

Easy Vegetable Soup with ground beef


I make this soup often especially when there are leftovers to be used up. I try not to waste any food if I can help it. So as for the vegetables in this soup you can add as many or as few of any kind that you like or have on hand. I wanted to add corn but I ran out of space in my pot. We ate this stuff for three different meals it was so good. Last night's dinner finished it off with a piece of crusty bread.
* Just a note I used Emeril's SW Essence which is mostly chilipowder, cumin, coriander and sweet paprika, so if you don't have it you might try a combination or one of those ingredients or nothing it doesn't require it.

Ingredients:
1 rib celery
* 2 tsp Emeril's SW Essence - optional
1 tsp rock salt
3/4 c black beans precooked
1 tsp smokehouse ground black pepper (any black pepper will do)
1 pound ground beef or ground mince
2 shallots chopped
2 cans chopped tomatoes
3 large potatoes, chopped and pre-cooked
3 carrots, chopped and pre-cooked
2 1/2 cups chicken stock
1/2 cabbage pre-cooked
1/2 tsp Liquid Smoke - optional but recommended
1/2 c green garden peas
Oil for browning the meat (I use ground nut oil aka sunflower oil)
Parsley chopped, optional for garnish

Brown the ground beef in a little oil, when it's mostly done add in the shallots and celery and continue to brown until the shallots are caramelized a little. Set aside.
In large pot add tomatoes,chicken stock, Emeril's essence, beef mixture,Liquid Smoke and rock salt. Let this all simmer for about 10 minutes. Add in remaining vegetables except garden peas and turn down to the lowest simmer you have, put a lid on it and let it simmer for 30 minutes. Take lie off and remove from heat and stir in garden peas. Put lid back on and let it sit for about 15 minutes before you serve. Enjoy !

Wednesday 3 June 2009

Chicken stuffed with red pepper, blue cheese and mushroom

No pictures of this one but it was delicious. We eat a lot of chicken and I am always looking for new ways to serve it. We were so hungry I just couldn't be bothered to make a picture. Yum !
Serves 2

Ingredients:
2 chicken breasts, bash them out flat
2 – 3 tbsp nut oil ( I used peanut , use what you like)
2 - 3 large shallots, chopped fine
3 tbsp chopped mushrooms (I used canned sliced mushrooms)
Blue cheese
2 whole roasted red peppers
½ tsp dried Thyme, crushed
Smoked paprika
Salt and pepper to taste
¼ cup white wine or broth or water

Sauté shallots in oil until just beginning to caramelize, you know that nice smell onions and shallots take on when cooked in oil, then add the mushrooms to the pan. Sauté for about 1 minute and remove from heat to cool. (Don’t drain as what little oil is left will help to “oil” the chicken when it’s baked.

Once cooled the rest is just an assembly job. Split the shallots and mushroom mixture between the two chicken breasts and spread out thinly. Top that with pieces of the blue cheese. I didn’t specify how much but be generous. Sprinkle over with the thyme but roll it between your fingers to crush it to release the natural oils. It’s kind of like a jump start for the thyme. Take the roasted red peppers and split them in half so they lay out flat and lay that over the cheese.

Starting at the ends roll up and then lay in the roasting dish so where it meets that side down. If you have trouble just hold it pretty tight and start over. Then sprinkle over with smoked paprika, salt and pepper. Add to dish with wine, cover with aluminium foil and bake at approximately 375 degrees Fahrenheit for about 25 minutes. Allow to rest at least 10 minutes.

I served this with new potatoes, tossed salad and a nice glass of dry white wine.

Sunday 31 May 2009

The humble garden pea


No recipe for this one but a technique. My husband and I went to the veggie market on Saturday. I love going there. It's the same market that I took the picture for my blog header. Their vegetables are so fresh and tasty and the price is right. We bought garden peas and when we got home we shelled them and I cooked them and I thought I'd share how I did them. I will never ever do them any other way.

I brought some water to a boil. Take the pot off the heat. Pour the peas in and add salt if you like at this point. Put the lid on the pot and leave them alone until you are ready to eat. If you need to (and I did) you can heat them back up when ready to serve. These peas were the best I have ever had. And I believe the reason is they were not overcooked. I think we overcook way too many of our vegetables in particular. Try it and let me know how it goes for you. And besides how easy is that?

Friday 29 May 2009

Chicken Breast with Garlic and Balsamic Vinegar


I got this recipe from www.cooks.com They have some good recipes there so if you get a chance check them out. We both enjoyed this chicken. It has just the right amount of balsamic vinegar to make it have a hint of tartness which works wonderful with the mushrooms and thyme. I cut this recipe in half as we only needed enough to feed two and it worked wonderful. This picture doesn't do this dish justice.
Ingredients:
4 skinless, bonless chicken breasts
3/4 lb small to med size mushrooms sliced (I used one can of canned mushrooms)
2 tbsp flour
Salt to taste. if desired
Freshly ground pepper to taste
3 tbsp olive oil
6 cloves garlic, peeled (I grated mine finely)
4 tbsp balsamic vinegar
3/4 c fresh or canned chicken broth
1 bay leaf
1/4 tsp dried thyme
1 tbsp butter

1.Split each chicken breast lengthwise in half. Cut away and discard any thin membranes that may remain on the flesh.

2.Rinse the mushrooms, drain and pat dry (or if using canned drain)

3.Season the flour with salt and pepper and dredge the chicken breast halves in the mixture. Shake off excess flour

4. Heat the oil in a heavy skillet and cook the chicken breasts until nicely browned on one side, about 3 minutes over moderately high heat. Add the garlic cloves.

5. Turn the chicken pieces and scatter the mushrooms over all. Continue cooking, shaking the skillet and redistributing the mushrooms so that they cook evenly. Cook about 3 minutes and add the balsamic vinegar and broth. Add the bay leaf and thyme.

6. Cover closely and cook over moderately low heat for 10 minutes. Turn the pieces occasionally as they cook. ( I only did 7 mins here as it had already done 3 mins)

7. Transfer the pieces to a warm serving platter and cover with foil. Let the sauce with the mushrooms cook uncovered for about 7 mins on high heat. Swirl in the butter.

8. Remove and discard the bay leaf. Pour the mushrooms in sauce over the chicken and serve. Yield: 4 servings

Thursday 21 May 2009

Chicken stuffed with spinach and feta cheese wrapped in bacon


CLICK IMAGE FOR LARGER VIEW
2 chicken breasts flattened out ( I use a rolling pin)

2 large handfuls spinach, wilted

Feta Cheese cut in pieces

1/4 tsp nutmeg

cracked black pepper (optional)

4 slices bacon

1/4 c white wine


Fresh Parsley optional


Flatten out your chicken by placing it in between a piece of cling film (saran wrap) and bash it with your rolling pin until it's about 1/4 inch thin. I just try to get it all even if I can. I then wilted my spinach by putting it in a pot and adding boiling water on top. Leave it for a couple of minutes and drain the water out completely. I didn't add any salt to this recipe as feta is salty and so is the bacon and it really doesn't need it. Take your spinach and place it on each chicken breast then sprinkle with nutmeg. I added a few sprigs of parsley, I think it goes good with spinach. Add your feta cheese as much or as little as you want. I buy mine in water and it's already cut in cubes. I added 4 cubes to each one. Take two pieces of bacon and lay them out flat. Place your chicken breast over the bacon. Starting at one end roll up and place in baking dish which has 1/4 c white wine OR broth (chicken or veg) already in it.


Bake for 20 minutes at approximately 325 deg F until bacon has begun to crisp up.


I served mine with roasted red peppers and cannellini beans.

Sunday 10 May 2009

Peanut Butter Cups


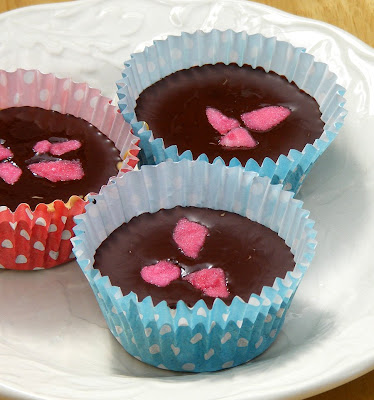
I made these and oh my, they are the best tasting things.They are sitting quietly and patiently in my freezer as I type this just waiting for me to come back. I am not a candy maker or a baker. But I just had to try this after I saw it on another food blog by ConfabulationintheKitchen
Thanks to Abby for a great recipe. The inside is just like the old peanut butter cup we all know and love in the orange wrapper. I used the full sized muffin cases and believe me you do not, I repeat, you do not want one of these things that big then again, maybe you do......hahaha. They are super delicious. My pictures don't do this recipe justice but those on the linked blog does. This recipe came from Martha Stewart, Everyday Food, March 2009, page 162

Notes: In the UK the dark chocolate is not semisweet. It's not sweet at all or at least what I got wasn't. I added 3 tbsp of sugar to mine and it worked just fine. I used pink sugar rose petals on top of mine instead of the peanuts.
Edited to add: All dark chocolate here is not unsweetened. Just the bar I had in my freezer was.....lol The next time I bought some it was sweetened.

Ingredients:
4 ounces white chocolate, chopped
1/2 cup smooth peanut butter
12 ounces semisweet or bittersweet chocolate, chopped
2 tablespoons unsalted roasted peanuts, chopped*

1. Line two 12-cup mini muffin pans with paper liners; set aside. In a microwave-safe bowl, combine white chocolate and peanut butter. Microwave, until almost melted, 1 to 1 1/2 minutes, stirring halfway through. Set aside to cool slightly.

2. Meanwhile, place semisweet chocolate in another microwave-safe bowl. Microwave, stirring once or twice, until almost melted, 2 to 3 minutes.

3. Dividing evenly, use a spoon to layer semisweet chocolate and peanut-butter mixture into liners, beginning and ending with chocolate; sprinkle with peanuts. Place muffin pans in freezer until peanut butter cups are firm, about 15 minutes. Bring to room temperature before serving

Wednesday 6 May 2009

Butterbean and Carrot Soup with bacon


I had a small bag of dried butterbeans up in my cupboard and decided I needed to finally do something with them. This soup is creamy and yummy and well it's just a nice comfort food. They're not called "butter" beans for nothing. Serve with a large piece of crusty bread. You could easily double this to feed a larger crowd.
Serves 3-4 generously

Ingredients:
1 cup dried butterbeans, (which have been soaked overnight)
1/2 onion chopped (or use 2 large shallots)
2 tbsp oil
6 slices bacon, fried until crispy and crumbled
2 carrots chopped in small pieces
1 small handful parsley chopped
1/4 tsp celery salt or 1 stick celery chopped
1/4 tsp Thyme
2c stock or broth ( I used chicken stock)
2-3 tbsp Dry Sherry (or use water or stock)
salt and pepper to taste
1/4 c. heavy cream (double cream) optional, could use tomato sauce

Directions:
Cook butterbeans on a low simmer in water for approximately one hour until soft.
When that is almost done pan fry your bacon and set aside. Using the same pan that you cooked your bacon in add in your oil and chopped shallots and carrots and cook until the onions are lightly caramelized but not burned. Just until they turn that little bit of color and release that wonderful smell that only comes from a caramelized onion. Then add your Sherry to deglaze the pan, just scrub around with the back of your spoon or fork until you get all those "good" bits loosened up.

Add all that to your pot and the stock and stir along with the chopped parsley and thyme. Simmer for approximately 20 minutes. When this is all done take out about half the butterbeans using a slotted spoon and mash them up. Add them back to the soup to thicken it. I also added 2 tbsp thickener (cornflour, arrowroot) along with the cream. At this point you can go either direction. You can add the cream or you could add tomato paste to go that direction. Season with salt and pepper to taste.

NOTE:
Notes:


Do not eat lima beans or butterbeans raw, as they contain cyanogens, from which the poison cyanide is made. The U.S. and many other countries restrict growing limas to those with low levels. Rinse well and cook before eating

Sunday 3 May 2009

Chargrilled Tuna with chili and lime


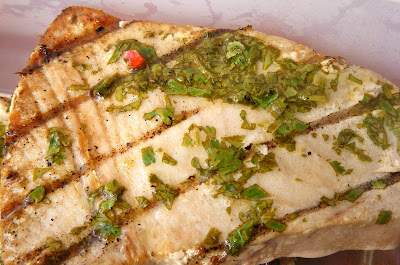
I made this over the weekend and it was wonderful. It came from our grocery store. They offer suggestions as to what to make and I tried this one. The key to this easy dish is don't overcook your tuna. Please cook it and leave it pink in the middle. Depending on how thick your tuna filet is anywhere from 3-4 minutes per side is usually enough. I usually do mine 4 minutes one side and 2 minutes the other as mine aren't that thick. Besides it still cooks a little even after you take it off the heat. These can be done in a griddle pan inside also. It just doesn't get any easier than this. I only used half a chili.

Ingredients:
1 Red Chili chopped finely (I used a half of a chili)
1 Juice of Large Lime
4 tbsp finely chopped coriander
2 tbsp sesame oil
4 Prime tuna s teaks
2 tbsp olive oil
Sweet Chili Sauce to serve with Tuna

Instructions:
1. Rub the oil over the tuna steaks and place on the preheated grill (or griddle pan). Cook for 3-4 minutes or according to preference, turning halfway through.

2. Mix the remaining ingredients together and brush over the tuna steaks a couple of minutes before they are ready tocome off the grill. I would brush it on when you turn them over to finish that last side. Serve remaining sauce (sweet chili) as an accompaniment, adding a tablespoon of water if you want.

Bluebells of Britain


click on picture for larger image
Hi there
I know this is not food related but I just could not resist putting a picture of the bluebells we saw yesterday when we went out for a little stroll in the woods.
They are just like a carpet of blue.
Sherrie

Saturday 25 April 2009

Baked Spinach & Artichoke Dip


This recipe was shared with me from a lady who goes by the nick name of Rainbow Meadows in a graphics group I belong to. Thanks lady !
Ingredients:
1 pkg frozen spinach, thawed, drained and excess water squeezed out
1 can artichoke hearts, drained and chopped
1 small onion, chopped fine
2-3 cloves garlic, chopped fine
1/4 cup mayonnaise
1/4 cup sour cream
1/4 cup parmesan cheese, grated
1 (8 oz) pkg mozzarella cheese, divided in half
1/2 teaspoon oregano
1/4 teaspoon basil
salt and pepper (I only added some pepper)
parsley for garnish

Place artichoke hearts, onion and garlic in bowl. Add drained spinach and stir. In another bowl combine mayo, sour cream, parmesan cheese and 1/2 of the mozzarella cheese along with the oregano, basil and salt and pepper. Add this mixture to the spinach, artichoke and stir well to combine all. Either use one baking dish or divide into two smaller dishes.

Sprinkle remaining mozzarella cheese on top and a bit of parsley. Bake at 400 degrees F for 15-20 minutes or until bubbly and beginning to brown. Serve with Tostito scoops, baguette bread or crackers.

Thursday 23 April 2009

Baked Chicken Tenders with Honey Mustard Sauce


click on image for larger view
These are really easy to make and they're baked so ohhhhhh so much better for you. I've done this various ways as far as the coating. For this one I used some corn flakes and some bread crumbs together along with the flaked almond and parmesan. I've also done it with just cornflakes and parmesan. Experiment with it they're all good.

Preheat Oven to 400 Degrees F. Line baking sheet with aluminium foil and spray with oil or drizzle with oil. I use the spray as it's just easier to work with.

Ingredients:
4 skinless boneless chicken breasts cut into strips
4 Tbsp sour cream
1 tsp smoked paprika
salt and apepper to taste
1 cup any cereal crushed or bread crumbs with any seasoning you prefer
1/2 cup breadcrumbs
1/4 c flaked almonds or sliced almonds
1/4 c grated parmesan cheese

In a large mixing bowl or ziploc bag (I use the bag it's easier clean up) mix your sour cream, paprika, salt and pepper and add the chicken strips and place in the refrigerator for at least one hour to marinate. I crush my cereal in a ziploc bag with a rolling in.

Combine cereal, bread crumbs, almonds and parmesan in a ziploc bag or bowl and mix well.
Add chicken strips to bag with cereal mixture and toss until it's all covered evenly. Arrange on your baking sheet and drizzle or spray over a little oil on top.
Bake for 10 minutes then turn over and bake for approximately 5 - 10 more until browned and cooked through.
Serve with Honey Mustard Dipping Sauce or Sweet Chili Dipping Sauce

Honey Mustard Dipping Sauce:
2 tbsp Dijon Mustard
2 tbsp mayonnaise
1 tbsp lemon or lime juice
1 tbsp honey
Mix thoroughly and serve.
I used lime juice instead of the lemon because that was what I had and it was wonderful.

Saturday 18 April 2009

Almond Praline Cheesecake

Let me begin by saying I am not a baker. I never have been nor will I ever be I don't think. But every now and then I find something that I think ohhhhh, now that sounds good and it looks easy I can do that. So I give it a try.

I made this wonderful cake but I didn't have the springform pan that it needs. But not to be defeated I forged ahead undaunted. Well, trust me you need that pan. You really, really do need that pan. I baked my cake in a regular cake pan, although a heavy duty one a regular one just the same. Sadly, it looks like it got hit by the ugly stick more than once but it tastes wonderful !

Then I thought okay no problem I'll just take my knife and go around the edges, slap a plate on top and it'll be out no problem. Well there was a problem. The cake came out perfectly unfortunately the graham cracker crust didn't. It stuck like a tic to a dog. I mean people it wasn't coming off. I then proceeded to scrape it off and I thought no problem I'll just "smear" it back on the cake. Then I took another plate and inverted it once again so I could add the wonderful almond praline topping. (and it is wonderful trust me on this one). Well when I did, the "top of the cake stuck to the plate I had put it on to begin with......aarrgghh. I scraped it off and placed it back on top of the cake where it belonged anyway. Then I proceeded to add my praline topping which by this time was a bit cold . . .bigger sigh.
BUT, having said all that this cake is definitely worth making. Even though mine looks like it's been hit by a BIG truck it tastes delicious. Hence, no picture today.
The recipe is from Eagle Brand and it really is a good one.

Ingredients:3/4 c graham cracker crumbs
1/2 c slivered almonds, toasted and finely chopped.
1/4 c firmly packed brown sugar
1/4 c butter or margarine melted
3 (8-ounce) packages cream cheese, softened
1 (14-ounce) can EAGLE BRAND Sweetened condensed milk
3 eggs
1 tsp almond extract
Almond Praline Topping

Instructions:Preheat oven to 300 degrees F. Combine graham cracker crumbs, almonds, sugar and butter; press firmly on bottom of 9-inch springform pan or 13x9 inch baking pan.
In large bowl, beat cream cheese until fluffy, Gradually beat in eagle brand milk until smooth, (do not overbeat) Add eggs and almond extract; mix well. Pour into prepared pan.
Bake 55 to 60 minutes or until center is set. Cool. Top with Almond Praline Topping. Chill. Store leftovers covered in refrigerator.

Almond Praline Topping: In small saucepan combine 1/3 cup firmly packed dark brown sugar and 1/3 cup whipping cream (heavy cream for UK). Cook and stir until sugar dissolves. Simmer 5 minutes or until thickened. Remove from heat; stir in 1/2 cup chopped, toasted slivered almonds. Spoon evenly over cheesecake. For 13x9 inch pan double topping ingredients and simmer until thickened.

Wednesday 15 April 2009

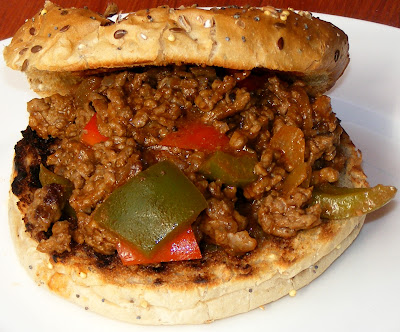
Sloppy Joes Quick and Easy


1 lb. ground meat (turkey or beef)
½ onion-diced
¼ green pepper-diced chunky
¼ red pepper diced chunky
½ c. catsup
3 Tbls brown sugar
1/3 Tbl Allspice
1/2 tsp ground nutmeg
1/2 tsp garlic powder optional
1 tbsp yellow mustard
¼ to ½ c water
S&P-to taste

Brown meat and onion and peppers in a little oil. Drain in colander. Add catsup and the rest of the ingredients. Add. water--simmer all until water evaporates; at least 10 minutes.
I served mine on toasted multi grain buns. I also used fresh allspice berries and crushed them. If I don't have them I just use the powdered allspice. The peppers can be cut smaller if you prefer them smaller. This is a very forgiving recipe to make a quick dinner.
I have a good friend who publishes on the blog Good Vegetarian Recipes which you can find http://jbsvegetarianrecipes.blogspot.com/ I think she made a vegetarian taco I wonder if you could do a vegetarian sloppy joe. Maybe she'll see this and let us know.

Tuesday 7 April 2009

Black and White Special Fried Rice with Morecambe Bay brown potted shrimps and red peppers


Ingredients:
1 c Basmati Rice prepared according to instructions
½ c Black Rice prepared according to instructions
1 large carrot chopped into small pieces
1 large red pepper chopped into small pieces (green would work just as well)
½ tub Morecombe Bay Potted Shrimps in butter (optional any baby shrimps will do or leave them out)
Vegetable oil
1 small onion chopped
1 egg, scrambled
½ tsp sugar
Sesame oil
Chopped parsley for garnish (optional)

The first thing I should say is you don’t have to use basmati rice, I do because I like it but any white rice, long or short grain will do, just use what you like. Don’t use an Arborio rice as that is more for a risotto. When I make rice regardless of what the instructions say I have always used ½ portion of rice to 1 whole portion of water. (example ½ cup rice to 1 cup water)


Note: I have just recently read but haven’t tried it yet that you will get better rice if you are cooking whole grain rice such as brown rice or black rice to use more water. The choice is yours but I am going to try it.
Okay now, back to the recipe. Take your chopped onion and sauté it in your pan with a little vegetable oil (I use sunflower oil). Add in your carrots and sauté for approximately 5 minutes. Then, add in your peppers and sauté a further 2-3 minutes. Remove pan from heat.


You want your pepper al dente. From here it’s just an assembly job really. Add in both the white and black rice’s to your pan which holds your vegetables, add in the shrimp, sugar and scrambled egg. You can add more egg if you like it eggy. Toss this all together.


When ready to serve sprinkle over a very little bit of sesame oil and garnish with chopped parsley if you wish.
This reheats wonderfully and keeps in the fridge for two to three days. (Ours never lasts that long.)

Thursday 26 March 2009

Pecan Encrusted Salmon with Dijon Honey Glaze


This turned out really good and was easy to throw together. I used two serving size salmon fillets and if you do reduce the cooking time accordingly.
Serves 4
1 large salmon fillet
1 1/2 cups breadcrumbs
1 cup pecans, chopped
1 cup parsley, finely chopped
salt and pepper
6 tbsp. butter, melted
6 tablespoons Dijon mustard
1/4- 1/2 cup honey
5 garlic cloves, chopped
1 lemon for juice (3 Tbsp juice)
2 tbsp olive oil, drizzle and whipped in slowly
Preheat oven to 350F; Line shallow roasting pan with non-stick aluminium foil or spray with non-stick pan spray.
Combine bread crumbs, pecans, parsley and salt and pepper to taste. Set aside. Make Dijon sauce by combining butter, Dijon, honey, garlic, lemon juice and olive oil.
Press crumb mixture on top of salmon. Drizzle Dijon mixture over salmon and bread mixture.
Bake salmon 15-20 minutes in preheated oven, or until it flakes easily with a fork. Drizzle glaze over salmon again half way through cooking.
Adapted from Recipezaar

Tuesday 24 March 2009

Rosemary Lemon chicken served with a classic white wine sauce


Serves 2
Ingredients:
2 chicken breasts
½ lemon cut in quarters
1 tbsp butter or margarine
1 tbsp rosemary ( I used fresh as I had a pot growing) dried is fine just make sure to crush it between your fingers to release the oils
1/4c dry white wine

Preheat oven to 375F, Take a roasting pan or bowl and pour wine in the bottom of it. Add chicken breasts and dot butter over chicken. Place lemon quarters cut side down in pan. Sprinkle rosemary over chicken. Bake for 20 minutes, uncovered.


See reduction below for the sauce recipe which follows: Click on image for larger picture.


White Wine Sauce
1 oz butter
½ c onions, finely diced ( I used shallots and only ¼ c)
1 c White Wine
1 ½ oz Demi-Glace Gold *
¾ tsp dry mustard, dissolved in warm water ( I didn’t have any so I used appx ½ tsp Dijon mustard instead)
½ c Water, hot
Sat and freshly ground pepper

Saute onion in butter for 2-3 minutes or until translucent. Add white wine, bring to a boil and reduce by half. (until you have half of the liquid that you started with) Add the demi-glace gold and whisk until it’s dissolved. Add the mustard and then enough water to reach desired sauce thickness. Strain the sauce and return to the pan. Add salt and pepper to taste and stir in additional butter if desired.

I served mine with asparagus with butter and lemon.
*Demi Glace Gold can be bought at many places off the internet. OR do a google search for demi glace and you will find lots of good recipes. It’s quite involved but if you have the time it’s a wonderful thing to have around.

Monday 23 March 2009

Grilled Aubergines (eggplant) with feta cheese and herbs


This recipe called for a handful of flat-leaf parsley and one of coriander. At the time I had neither so I left them off but I do think they would have benefitted from one of them. But, maybe not both of them in my humble opinion. I did sprinkle mine with a little dried coriander.


Ingredients:

2 large aubergines, sliced lengthways into 1/2 cm thick slices
olive oil
1 lemon, juiced
1 garlic clove, crushed
200 grams feta cheese, crumbled
a large handful of flat-leaf parsley, finely chopped
1 large handful of coriander, finely chopped
Salt and Pepper to taste

Instructions:

Heat a griddle pan or frying pan until very hot. Brush the aubergine with a little oil and griddle or fry in batches until soft and cooked through. Arrange on a platter. Mix together the lemon and garlic with 5 tbsp of oilive oil and drizzle over the aubergine. Then, scatter the feta and herbs over them and salt and pepper to taste and serve. This was really a nice change of pace for us. Just remember the feta cheese is salty already so you may not need very much salt at all.


Sunday 22 March 2009

Zucchini aka Courgettes with parmesan


2-3 medium Zucchini aka Courgettes

1/4 cup olive oil (or sunflower)

1/4 cup grated parmesan

salt and pepper to taste

Lemon juice optional


This is such a simple and fresh tasting dish. And a very good way to add another veggie to your diet. Take a zucchini or courgette as they are called in UK and wash and slice. I didn't even cut the ends off you can just discard those when you inhale these beauties !


I used a grill pan to cook these one. Heat your grill pan over a medium high heat. You want it pretty hot just not smoking. Do NOT put any oil in it.


Take your zucchini and sprinkle over a little olive oil or sunflower oil (your choice) and then toss your zucchini around in the oil to coat it. Lay your zucchini one by one in the pan in a single layer. Leave them long enough to color one side before turning them over. The key is not to turn them too soon or your grill marks won't be nice.


Right before you take them out sprinkle over with about 1/4 cup parmesan cheese. I would then taste one before you decided about adding salt (I didn't add any salt) as the parmesan is salty. Add a spritz of lemon juice if you like at the end. This is optional


Notes: I think mine would have been better if I had cut them a little thicker. And next time I will discard the outside cuts from each side. That skin does not cook up good to me. Additional note, I could eat this twice a week it's that good. And who knows this summer I just may. :0)

Swiss Chard


I tried something that was new (for me) Swiss Chard. It's really got a good flavor and a firm texture. It's much firmer than spinach or something like that. I just washed it and cut it up into small pieces, and then I simmered it in a little chicken broth for added flavor. Add a little salt and pepper to taste. I am always looking for new veggies to add to our diet. And I try to stay away from as many processed foods as we can.


Now for the good news Swiss Chard is:


Low in Saturated Fat, Cholesterol
High in Dietary Fiber, Vitamin A, Vitamin C, Vitamin E, Vitamin K, Riboflavin, Vitamin B6, Calcium, Iron, Magnesium, Phosphorus, Potassium, Copper, Manganese, Thiamin, Folate and Zinc. Also high in Sodium.


I can't wait to use it in a good vegetable soup.

Saturday 14 March 2009

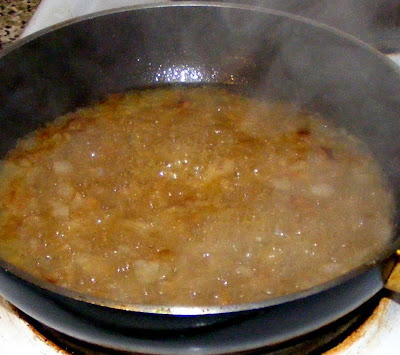
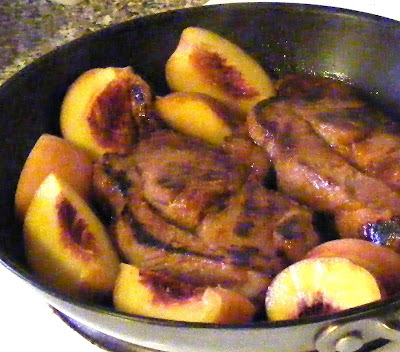
Caramelised Pork with fresh peaches


This recipe is a simple, one-pan dish that requires very little preparation.

Ingredients:
1 1/2 cm root ginger, peeled and grated
2 tsp Double Concentrated Italian Tomato Puree
2 tsp Soya Sauce Light
2 tbsp pure clear Honey
2 tbsp Olive Oil
4 Pork Shoulder Steaks
4 Perfectly Ripe Peaches, washed, halved, stoned and quartered.

Serves 4

NOTE: I cut this recipe in half and it worked fine for us.


Instructions:

To make the marinade, mix trogether the ginger, tomato puree, soy sauce, and honey and oil in a large, shallow dish. Add the pork to the marinade, coating well. Cover and chill for 2-3 hours.
(I put mine in a ziploc bag so I don't have to wash a dirty bowl)

Heat a large non-stick frying pan over moderate heat and place the marinated pork in the pan. Reduce the heat slightly and cook for 7-8 minutes on each side until thoroughly cooked, the juices run clear and there is no pink meat.

Add the peach quarters to the pan and cook, uncovered, for about 1-2 minutes on each side until just softened and slightly charred. Serve the prok and peach with white rice and a veggie of your choice. I served mine with Swiss Chard.

NOTE: When I put my pork in my pan I had it too hot. So it almost burned before it cooked and it was tough. Remember there is honey in that marinade and it will burn easy. So, I then put it in my pressure cooker and cooked it for 10 minutes and it's nice and tender.

Sunday 8 March 2009

Crushed Potatoes with Rosemary


I love to make crushed potatoes and you can make them with any "seasoning" you want but for me rosemary just goes with potatoes. This is going to be such an easy side dish.

Ingredients:
6 smallish potatoes, peeled
1 tsp chicken broth granules (or 1 chicken stock cube)
1 tsp rosemary, crushed
2 tbsp butter


I boiled 6 smallish potatoes in chicken broth. Just add water according to the instructions. Those potatoes just soak up all that good flavor. Then when they're done drain them and then crush with your potato masher or a fork. You don't want them creamed or smooth, just crushed up. Then add your butter and rosemary. These are so easy to make and so good. For those nights when you're in a hurry to make a side dish, sling these on.
Note: You can cook them in the microwave until done then follow the instructions from there. For added appeal I would sprinkle mine next time with paprika, I prefer smoked paprika but either is okay.
Serves 2-3

Tuesday 3 March 2009

Been Away for a few

Hello Fellow Foodies !
I have been away for a few days. I made a visit back home to visit friends and relatives. I have lots of pictures to sort out. I miss my friends and family already and one particular little grandson! Whom I found out is going to be published in a magazine ! I can't wait to see it ! I had a wonderful time and now I am trying to recover (jet lag)and get back down to some cooking ! So I hope to be posting some good recipes soon. I know my photography isn't very good and they certainly do not do the recipes justice so you'll just have to trust me on these. I don't post a recipe unless it's really tasty and I think it is something others might like to try.
Sherrie

Thursday 5 February 2009

Broccoli with crispy bacon, mozzarella and basil dressing


Peter Gordon, Head Chef at two of London's top restaurants, says: "It's the fresh taste, and crunchy texture, of the Tenderstem® broccoli combined with the salty bacon and smooth mozzarella that makes this dish so intriguing."
I made this on Saturday night and we loved it. A definite will make again recipe. The cheese goes a little gooey and the taste of the bacon and lemon. Oh my it's good.

Serves: 2 as a main course
Takes: 15 mins

Ingredients:
300g Tenderstem® broccoli
100g smoked bacon
1tbsp extra virgin olive oil
1/2 red chilli, finely sliced (or use a few pinches of hot chilli flakes)
1 tbsp (heaped tbsp) shredded fresh basil leaves
1 tbsp lemon or lime juice
1 tsp soy sauce
2 mozzarella balls

1. Heat up the frying pan and add the bacon and 1/2tsp of the oil.
Cook over a moderate heat until the bacon becomes crispy. Add the chilli and cook for another 30 sec. Using a slotted spoon remove the bacon and chilli from
the pan onto a warm plate, keeping the tasty fats in the pan.
2. Add the Tenderstem® broccoli to the pan and toss it to coat with
the pan fats (making it even more tasty) and cook for 30 sec on high heat to colour a little. Add 4tbsp of hot water to the pan and immediately put the lid on.
Cook over a moderately high heat for 1-2 mins with the lid on.
Ideally the Tenderstem broccoli will still have some crunch to it.
3. While the Tenderstem® broccoli is cooking, place the basil with the remaining olive oil in a jam jar and give it a shake with the lid on. Add the lemon juice and soy sauce and shake again.
4. Cut each mozzarella ball into 6 slices.
5. Once the Tenderstem® broccoli is cooked pile it onto 2 plates, then the mozzarella and spoon the bacon over that. Shake the dressing and drizzle it over the mozzarella.